Adding accounts
A step-by-step guide to connecting your bank, brokerage, or crypto-exchange accounts to Synci.
Written By Matias
Last updated 3 months ago
Formerly "Adding bank accounts": Synci now supports brokerages and crypto exchanges in addition to banks. The connection flow is the same for all three; any differences are called out below.
Adding accounts to Synci is done by creating a financial connection to the institution that holds them. Once the connection is authorized, Synci automatically retrieves all accounts you've granted access to. To learn more about connections themselves, see the Financial connections article.
1. Select an institution
Go to the Banks, Brokerages, or Crypto page and search for your institution.
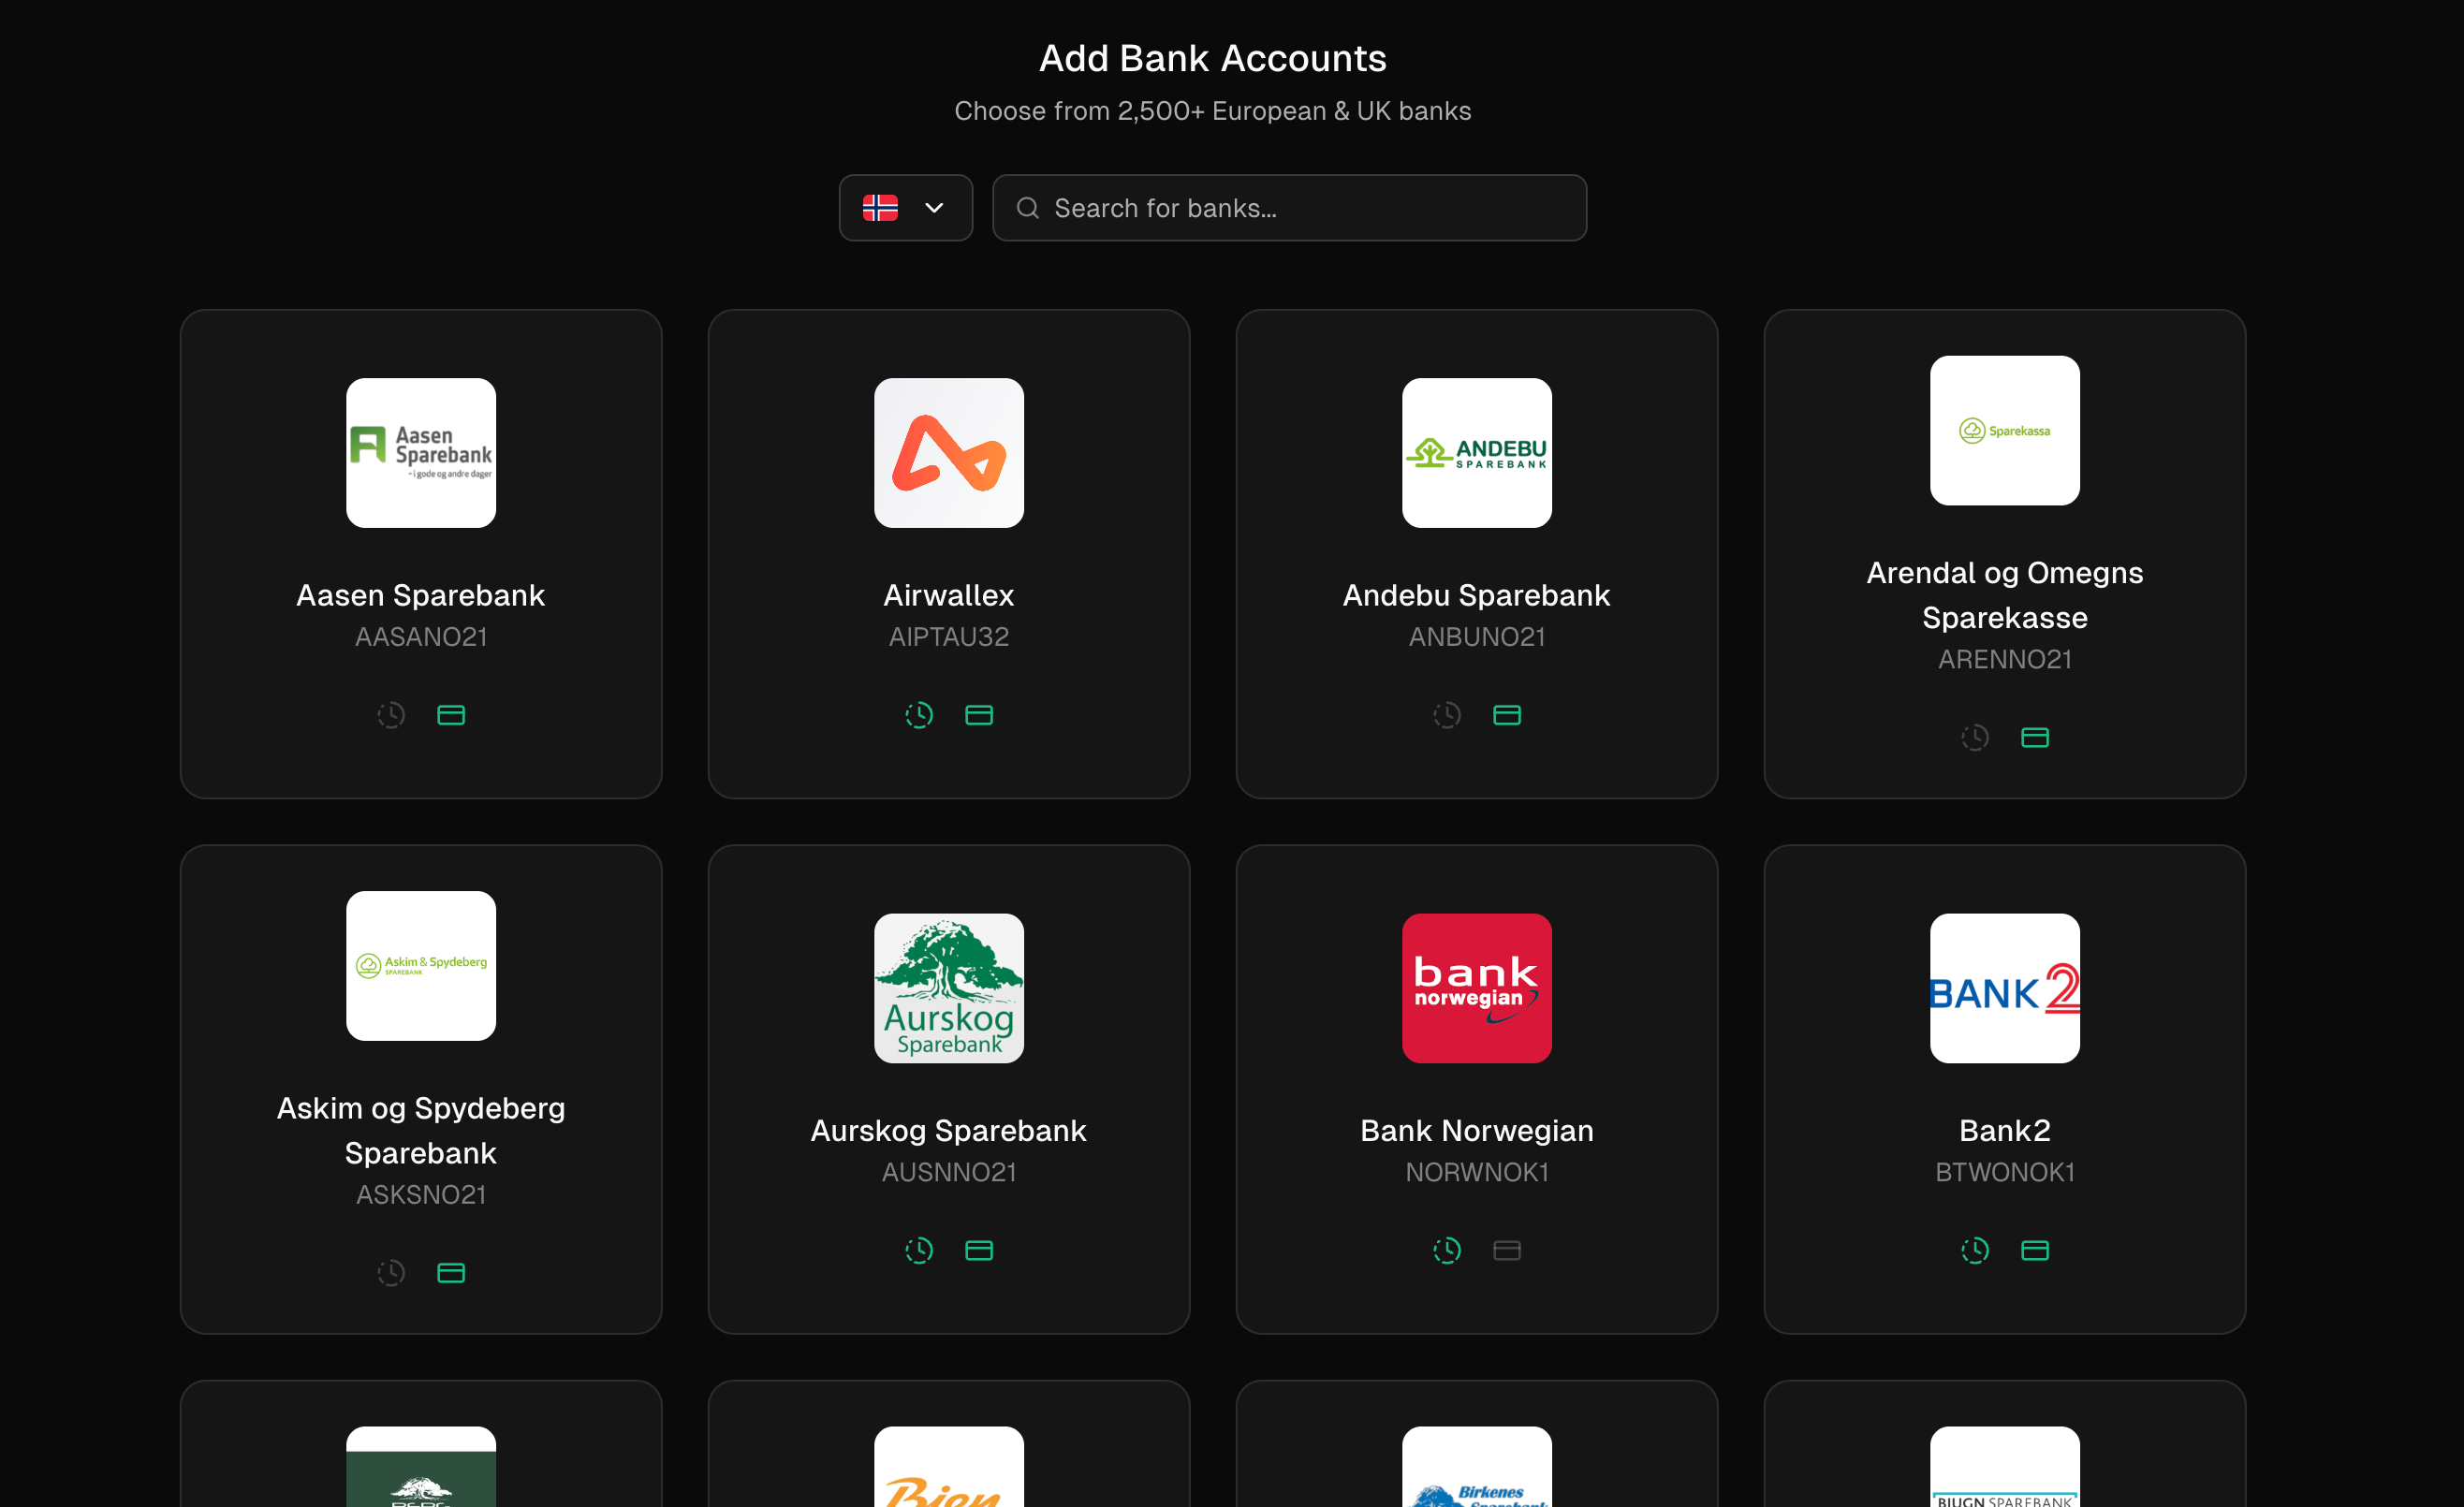
For banks, each institution shows two indicator icons:
Clock icon: Whether the bank supports syncing pending transactions.
Card icon: Whether the bank supports syncing credit card accounts.
Green means the feature is supported. Gray means support is uncertain or unavailable. If a feature you need shows as uncertain, it's worth testing the connection anyway; actual functionality often exceeds the initial indication.
2. Create the financial connection
After selecting an institution, confirm the connection in the dialog that appears.
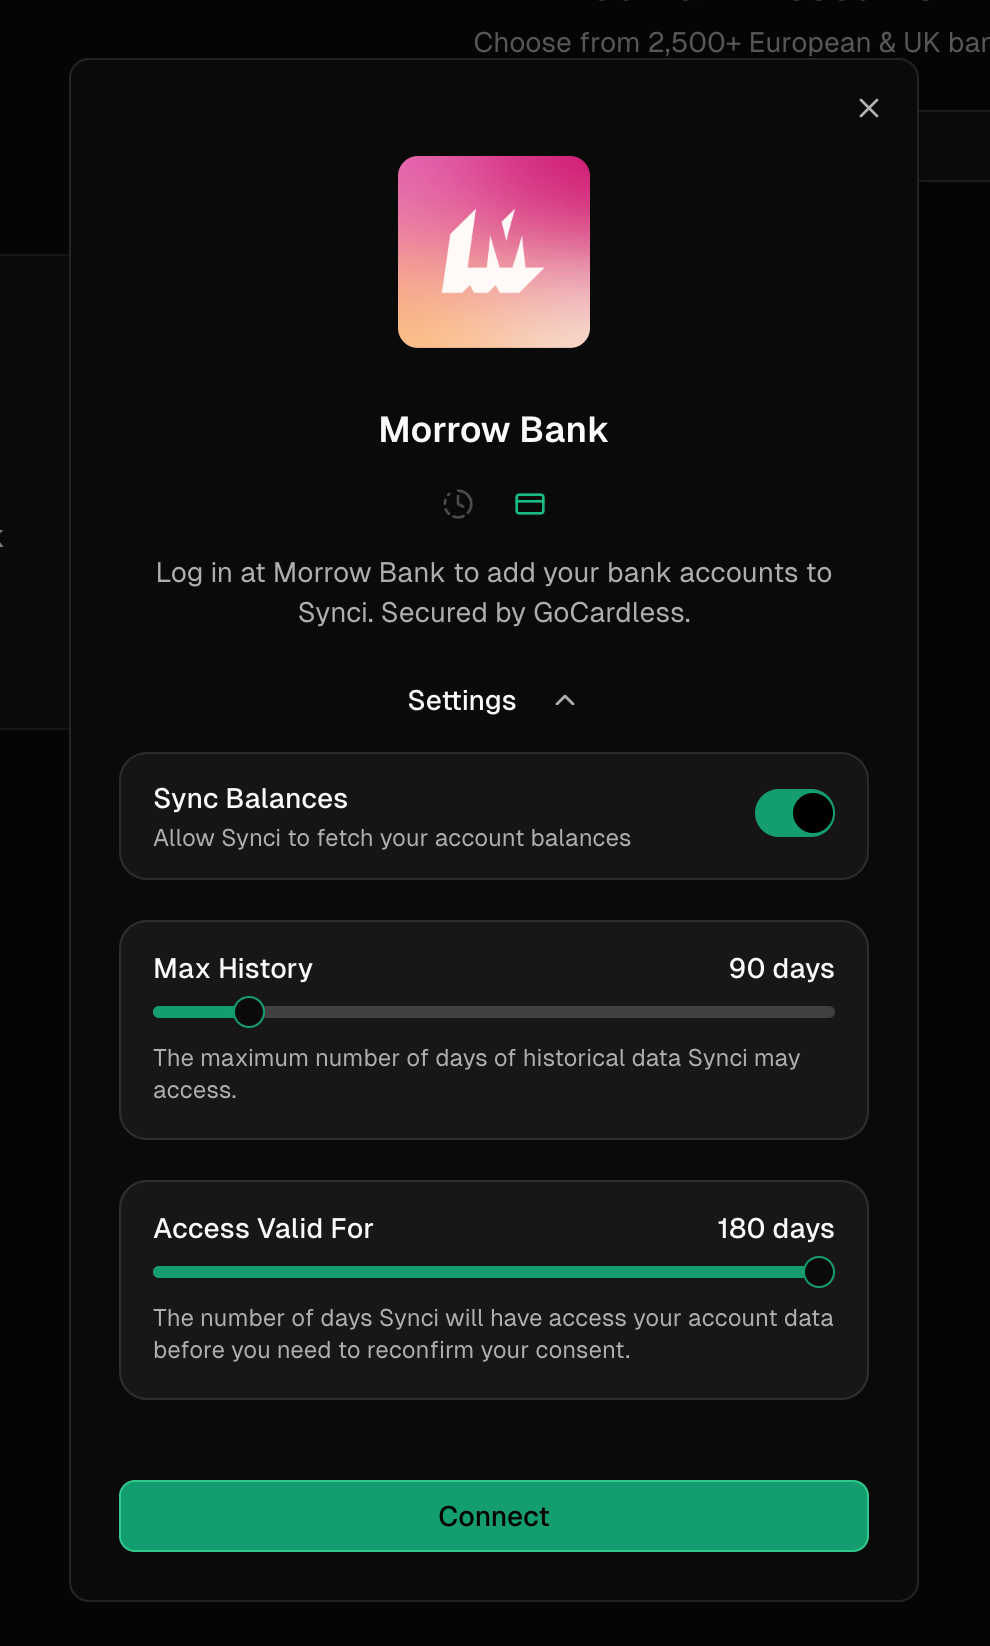
If you're connecting an EU or UK bank, you can customize the consent before proceeding via the Settings option: how long Synci's access stays valid, how far back transaction history reaches, and whether balances are synced. These settings are part of the consent agreement and can't be changed afterwards without renewing it, so it's worth a quick review here. New Zealand banks, brokerages, and crypto exchanges don't have a time-limited consent, so this step doesn't apply to them.
3. Log in at your institution
Synci redirects you to our data provider, where you review and grant the requested permissions. You then authenticate directly with your institution, using whatever login method it requires (for example username and password, BankID, or your national ID number).
Synci never sees your login credentials. Authentication always happens at your institution or its official identity provider, and the access Synci receives is strictly read-only.
4. Connection authorized
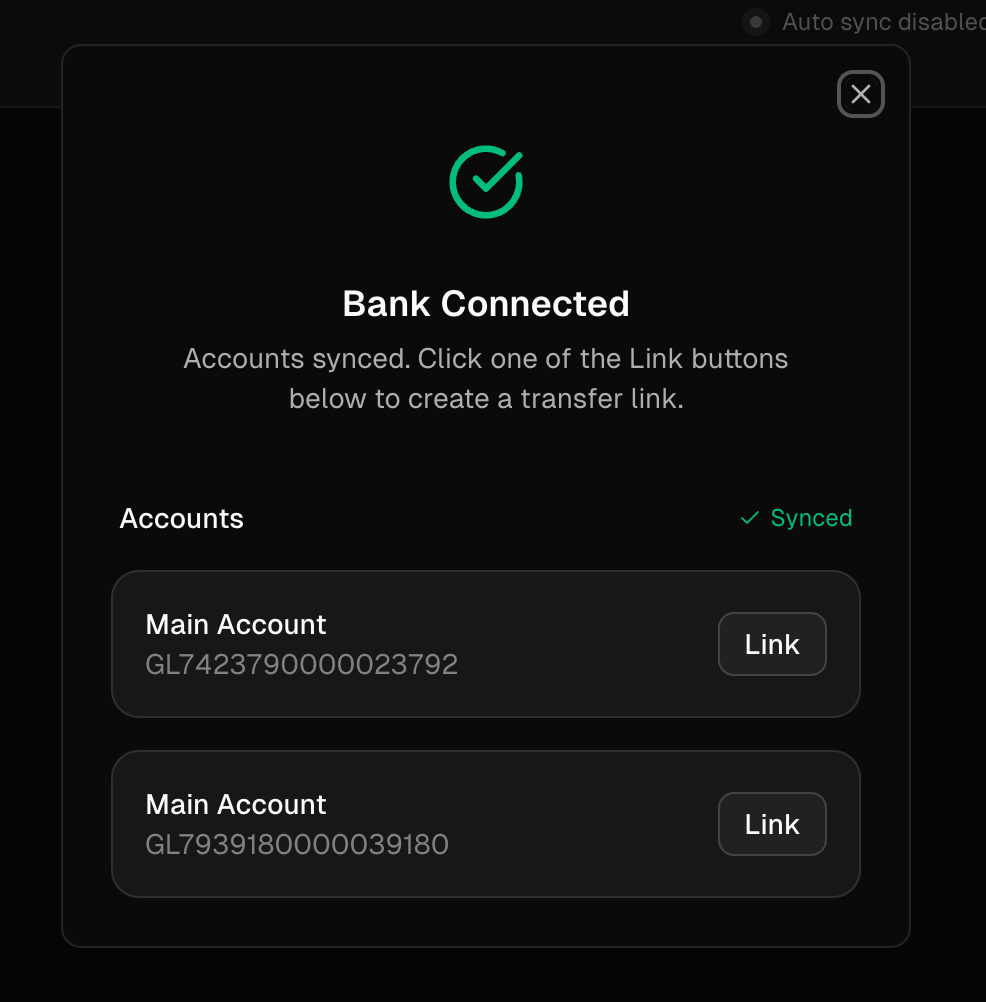
Once you've authorized the connection, you're returned to Synci, which immediately begins fetching your available accounts. For brokerage and crypto connections, Synci also fetches your holdings and account activity. Note that most brokerages deliver activity data with roughly a one-day delay, so it may take up to a day before all activity appears.
When the fetch completes, your accounts are ready to use. The usual next step is linking them to a destination: see Linking bank accounts to destinations.
Troubleshooting
An account is missing: Some institutions only expose accounts you explicitly selected during authorization. Renew or reauthorize the connection and make sure all accounts are selected.
The connection failed during setup: Try again; temporary outages at institutions are common. If it keeps failing, the error message shown on the connection page usually explains why.
Your institution isn't listed: See the Supported institutions article, or contact us to ask about adding it.
Was this helpful?
Still need help? Ask the team